Google OAuth2
Git : https://github.com/handsome-tiger-789/google-oauth2
이 글에선 간단하게 OAuth2 를 이용한 로그인 프로세스를 구현해보고자 한다.
OAuth2를 위한 라이브러리 사용과 전체적인 통신 흐름만 다루기 때문에 구체적인 오류 핸들링은 다루지 않는다.
Google Cloud Console 설정
구글 OAuth2 사용을 위해 우선 프로젝트를 생성한다.
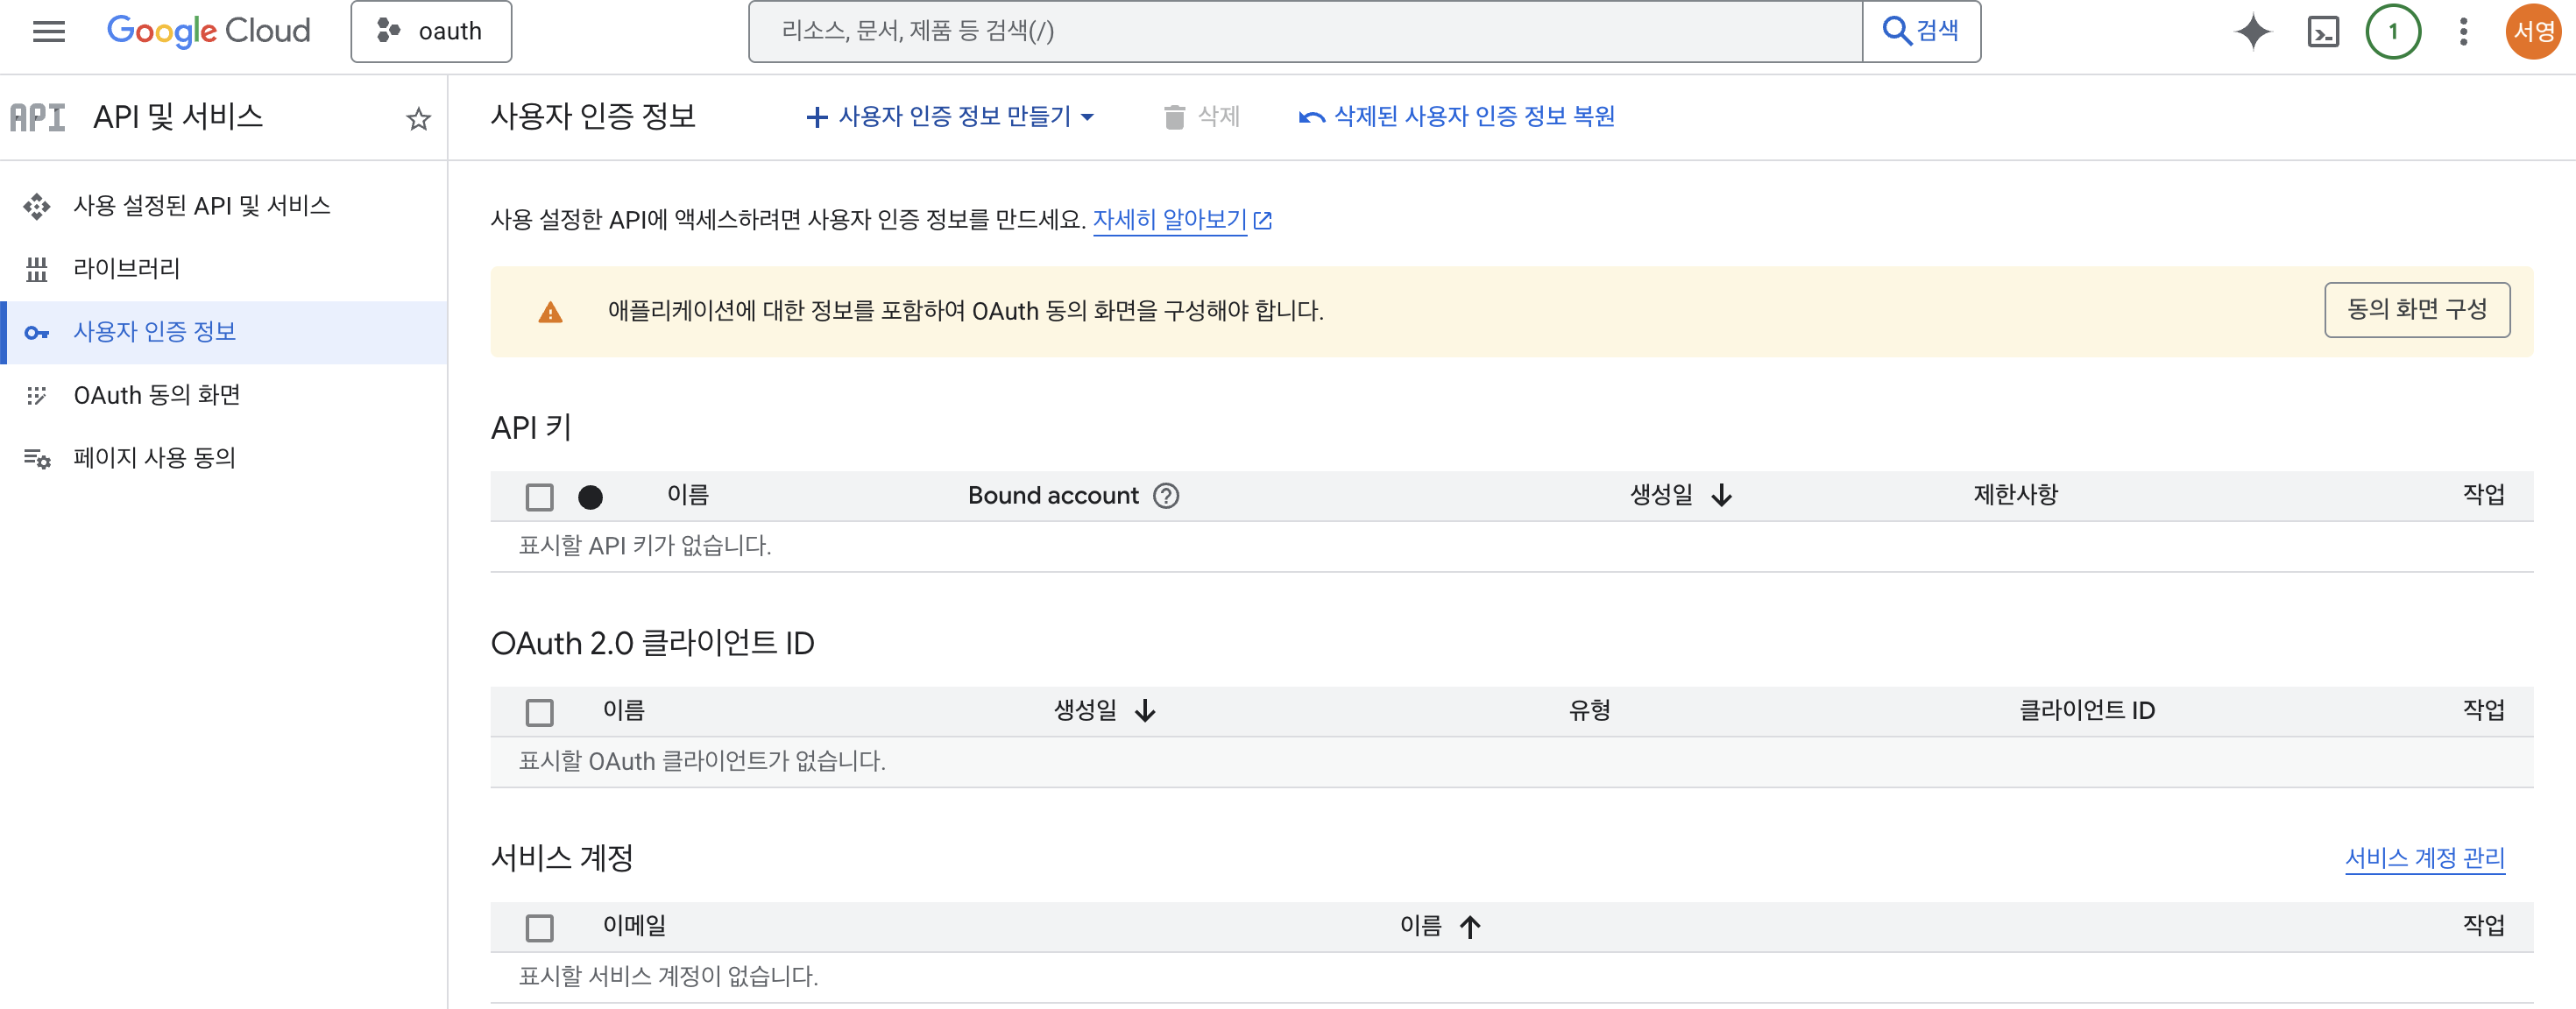
프로젝트 상세 > API 및 서비스 > 사용자 인증 정보 메뉴로 들어오면
처음에 OAuth 동의 화면을 구성하라고 나온다.

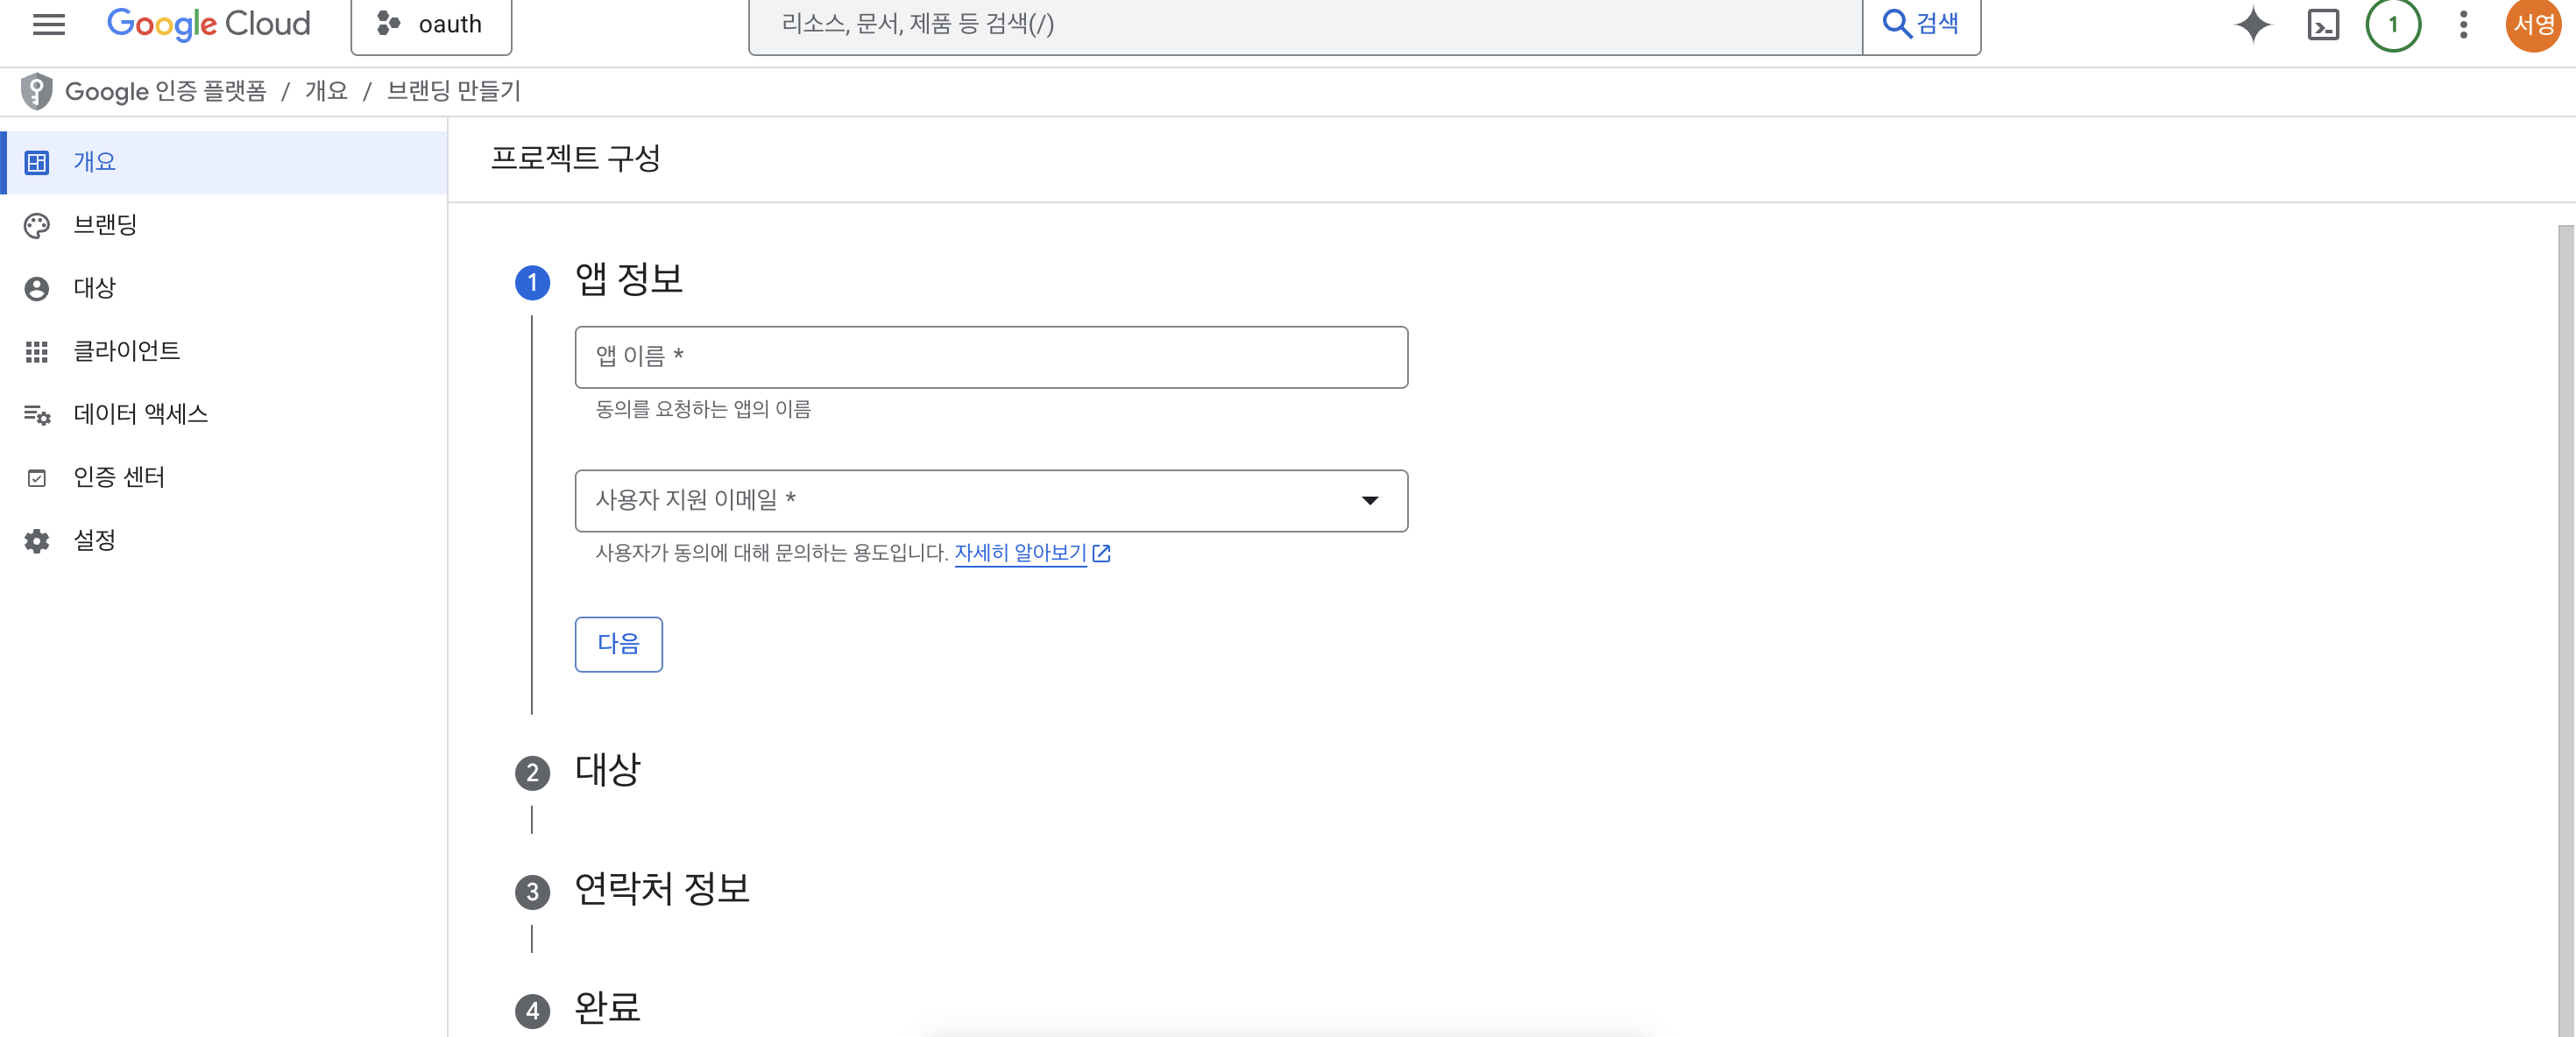
순서대로 앱 이름과 사용자 지원 이메일 작성
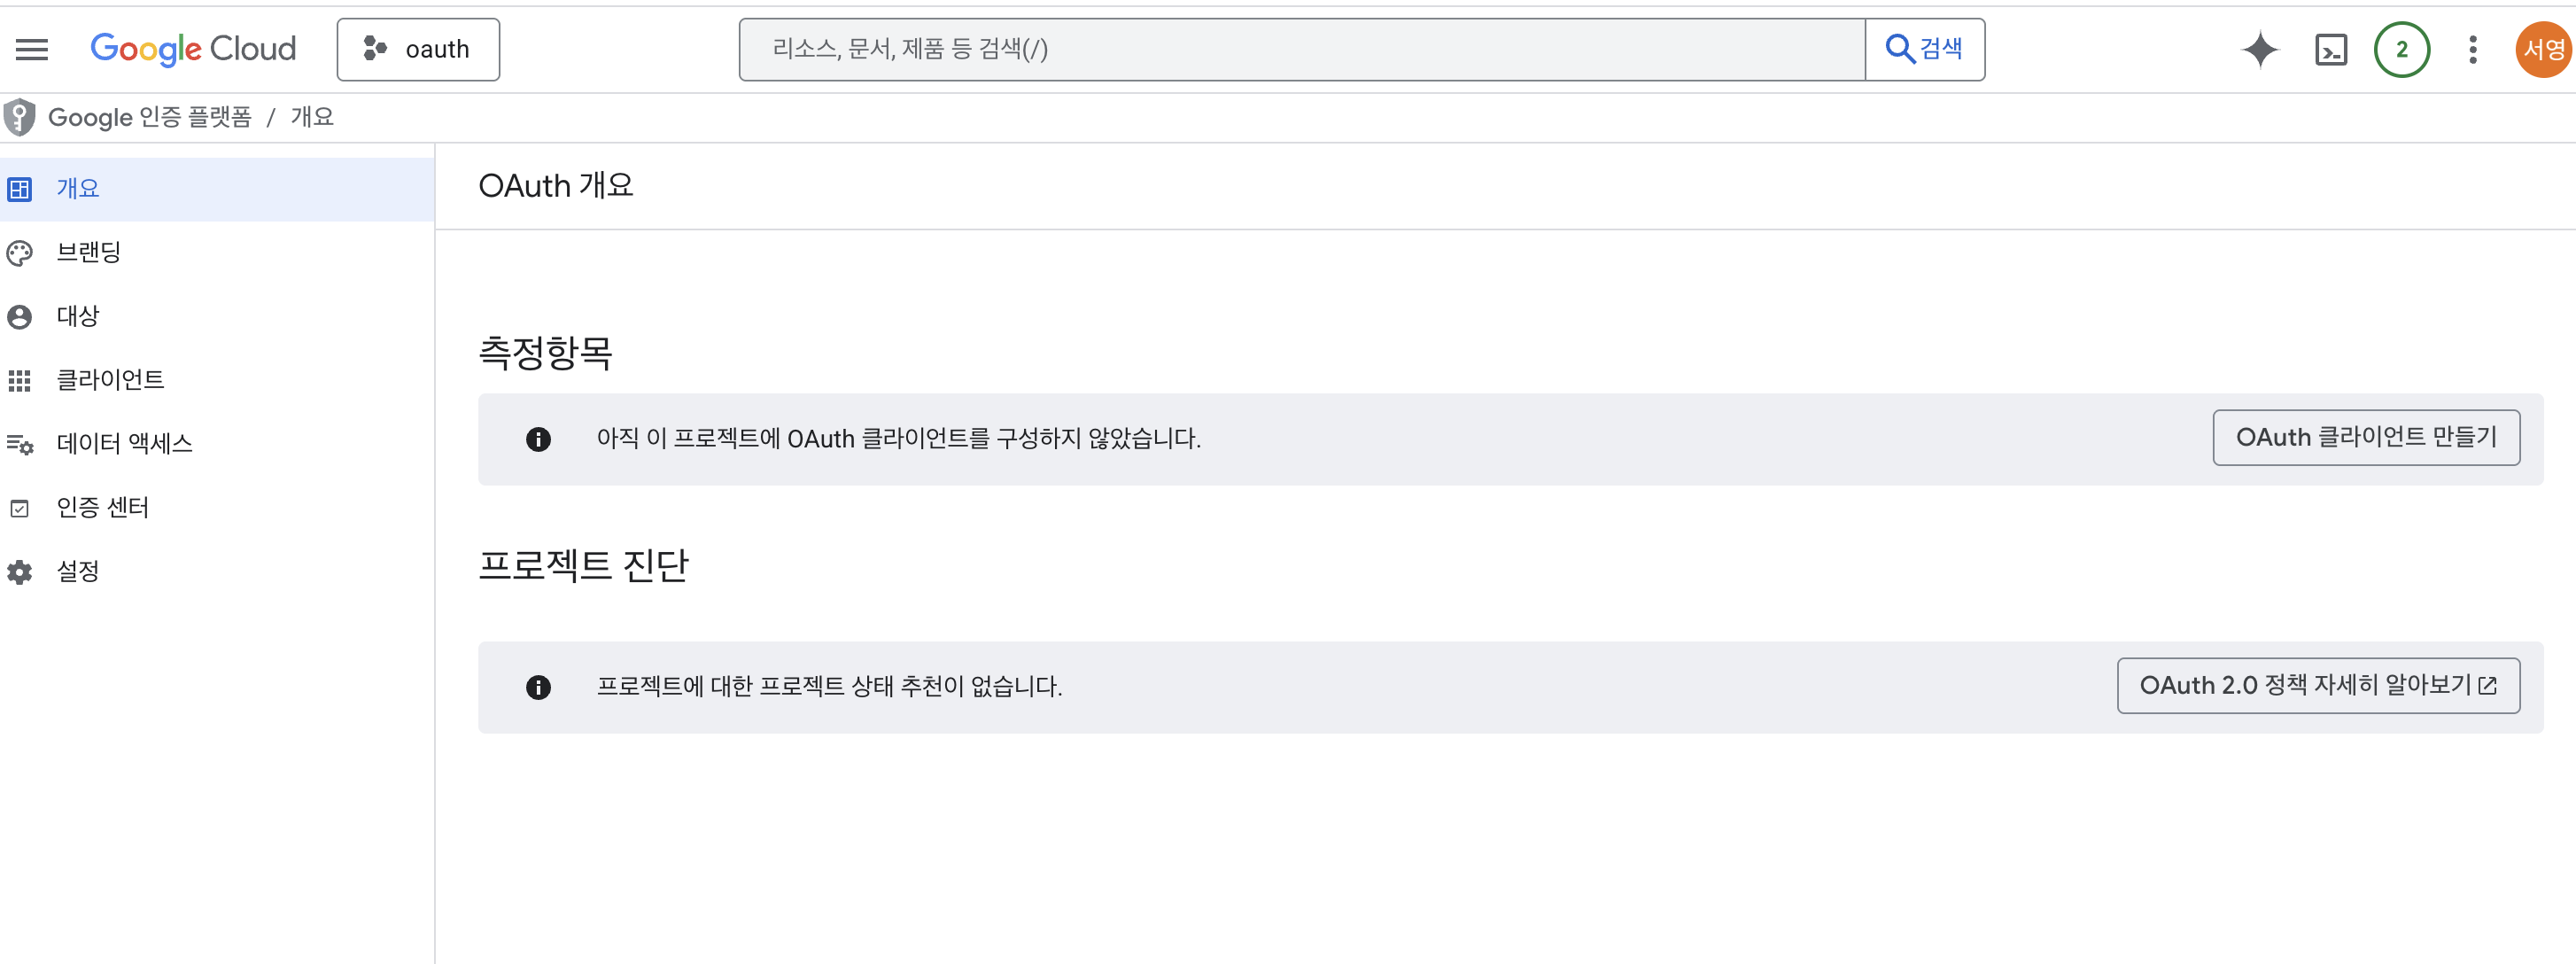
위 작업 후 OAuth 클라이언트 만들기
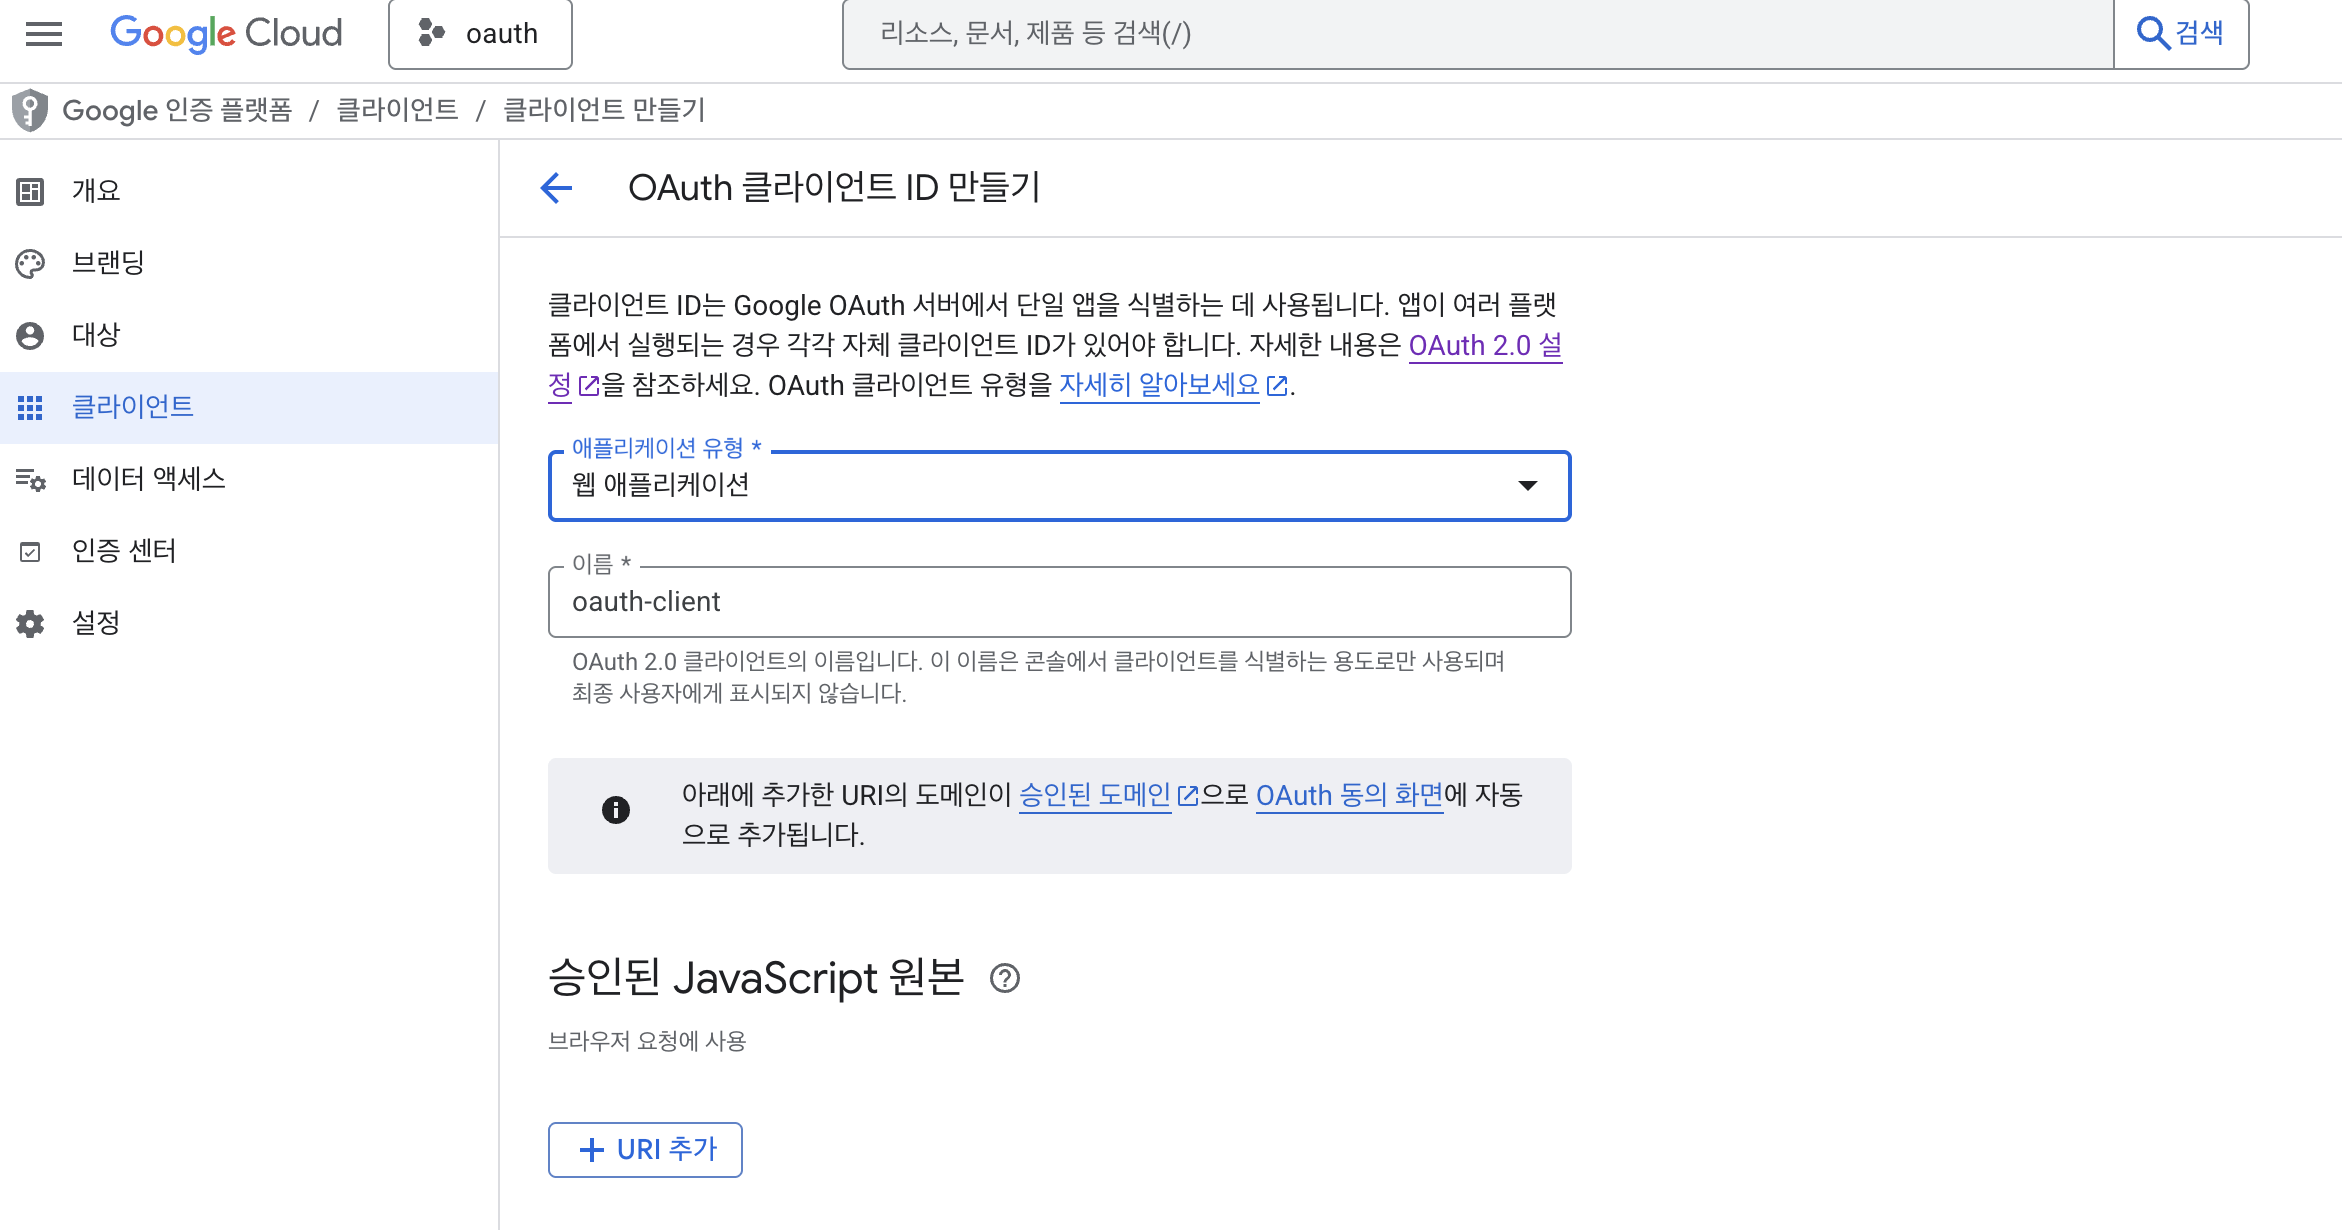
어플리케이션 유형은 웹 어플리케이션으로 만들고 이름은 원하는대로 작성
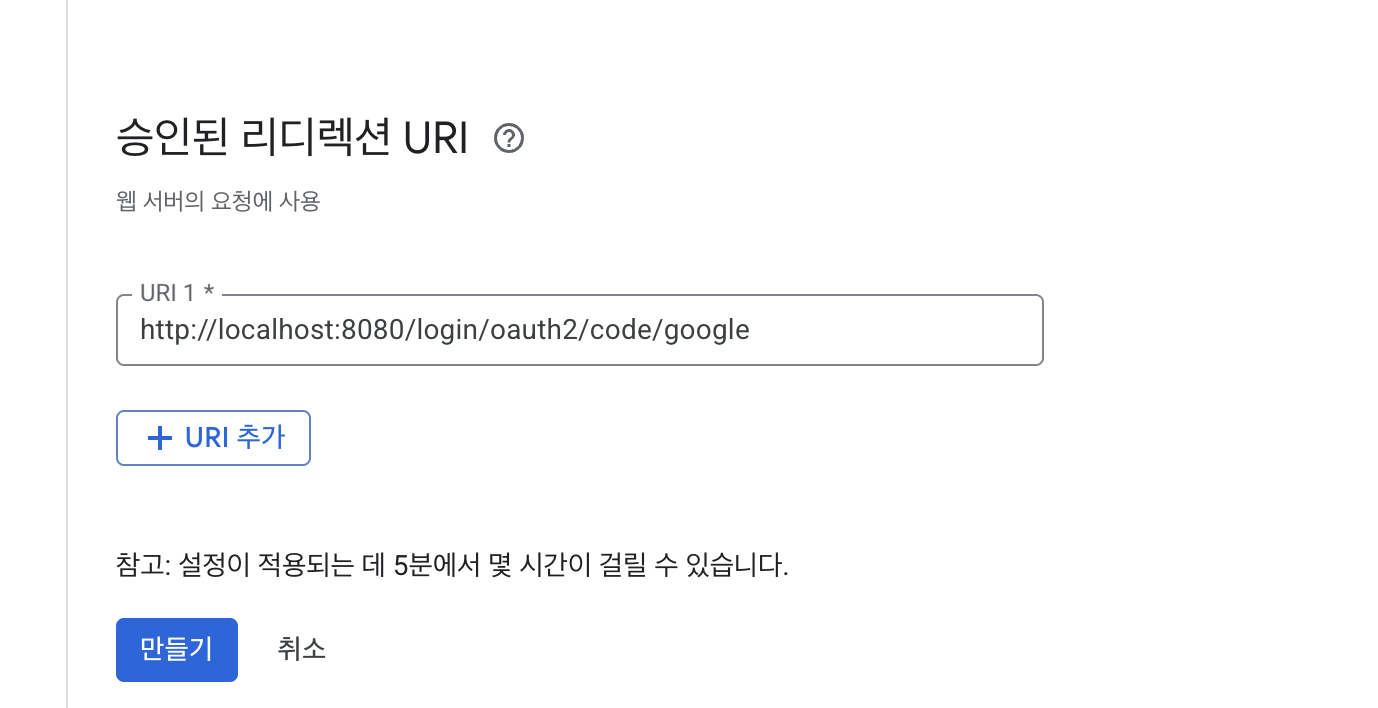
리다이렉션 URL은 커스텀하지 않으면 /login/oauth2/code/google 이다.
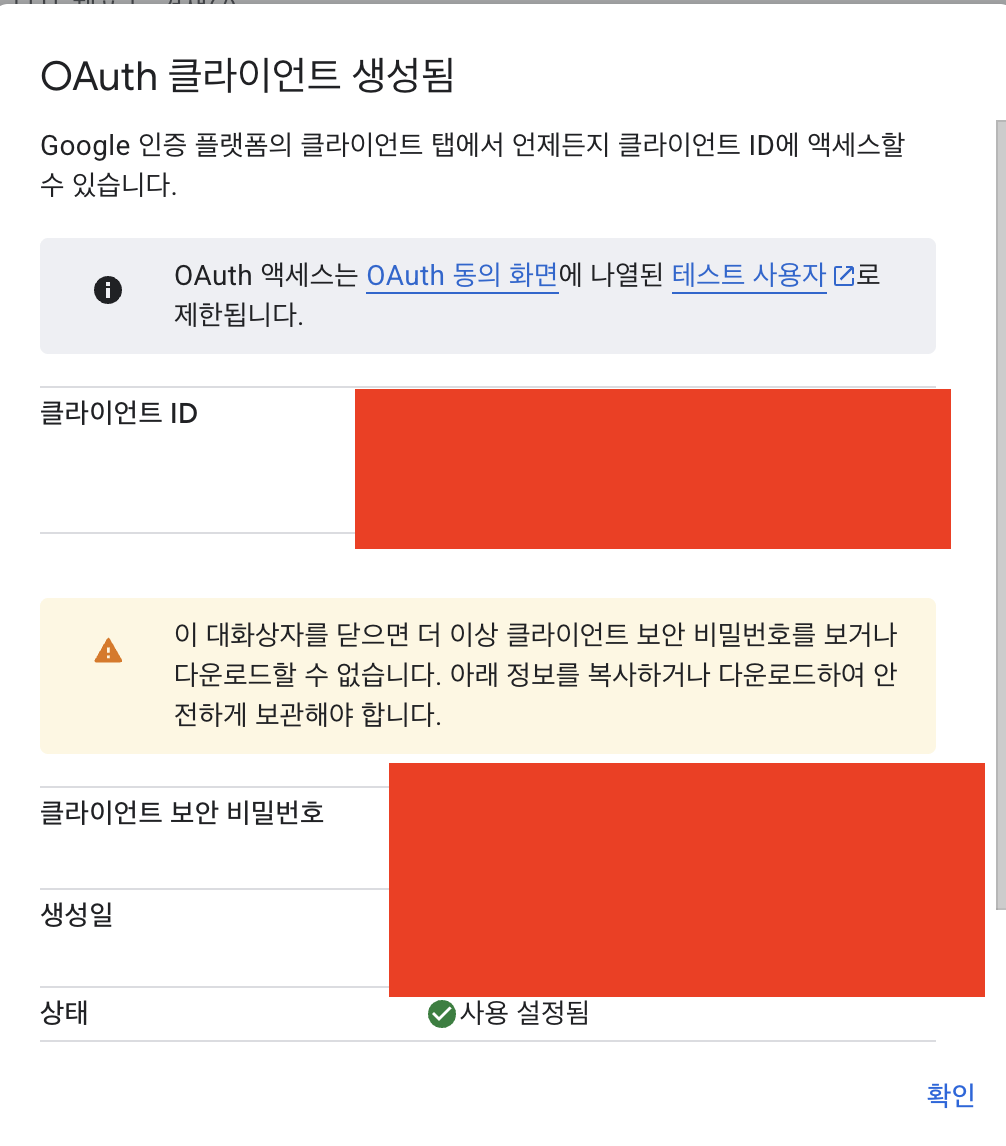
위 클라이언트 추가가 끝나면 연동에 필요한 클라이언트ID, Secret을 확인 할 수 있다.
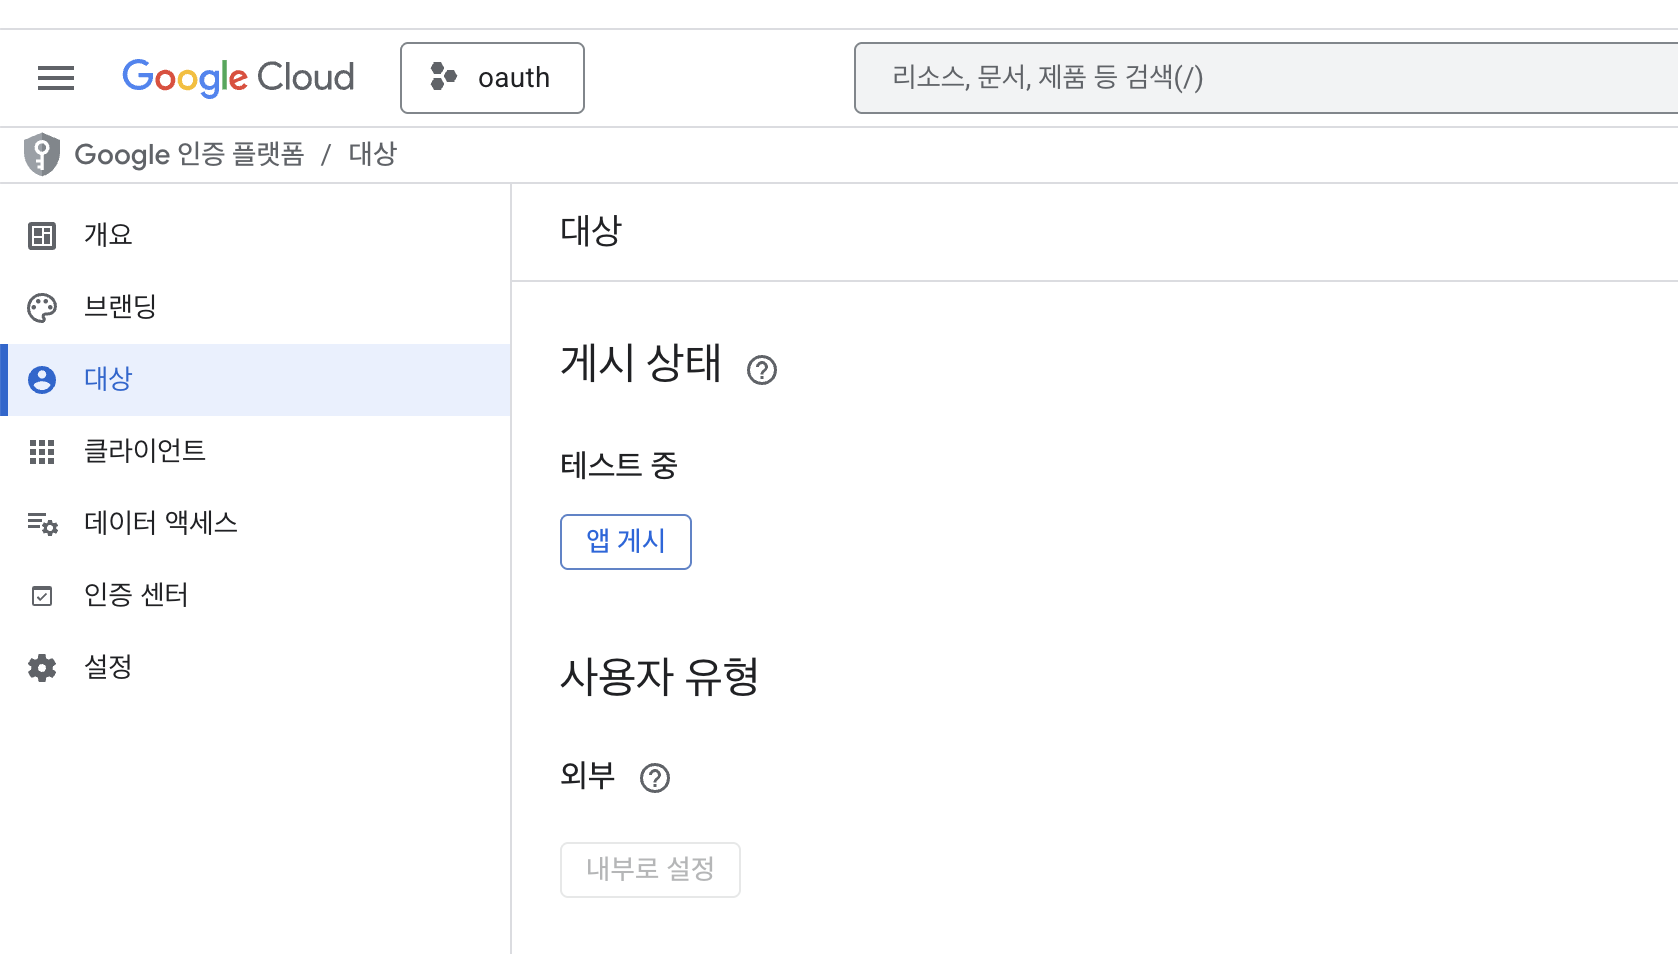
대상 메뉴에서 기본적으로 테스트 중 상태인데 앱 게시 또는 아래 테스트 계정을 추가해야 401 오류 없이 작업이 가능하다.
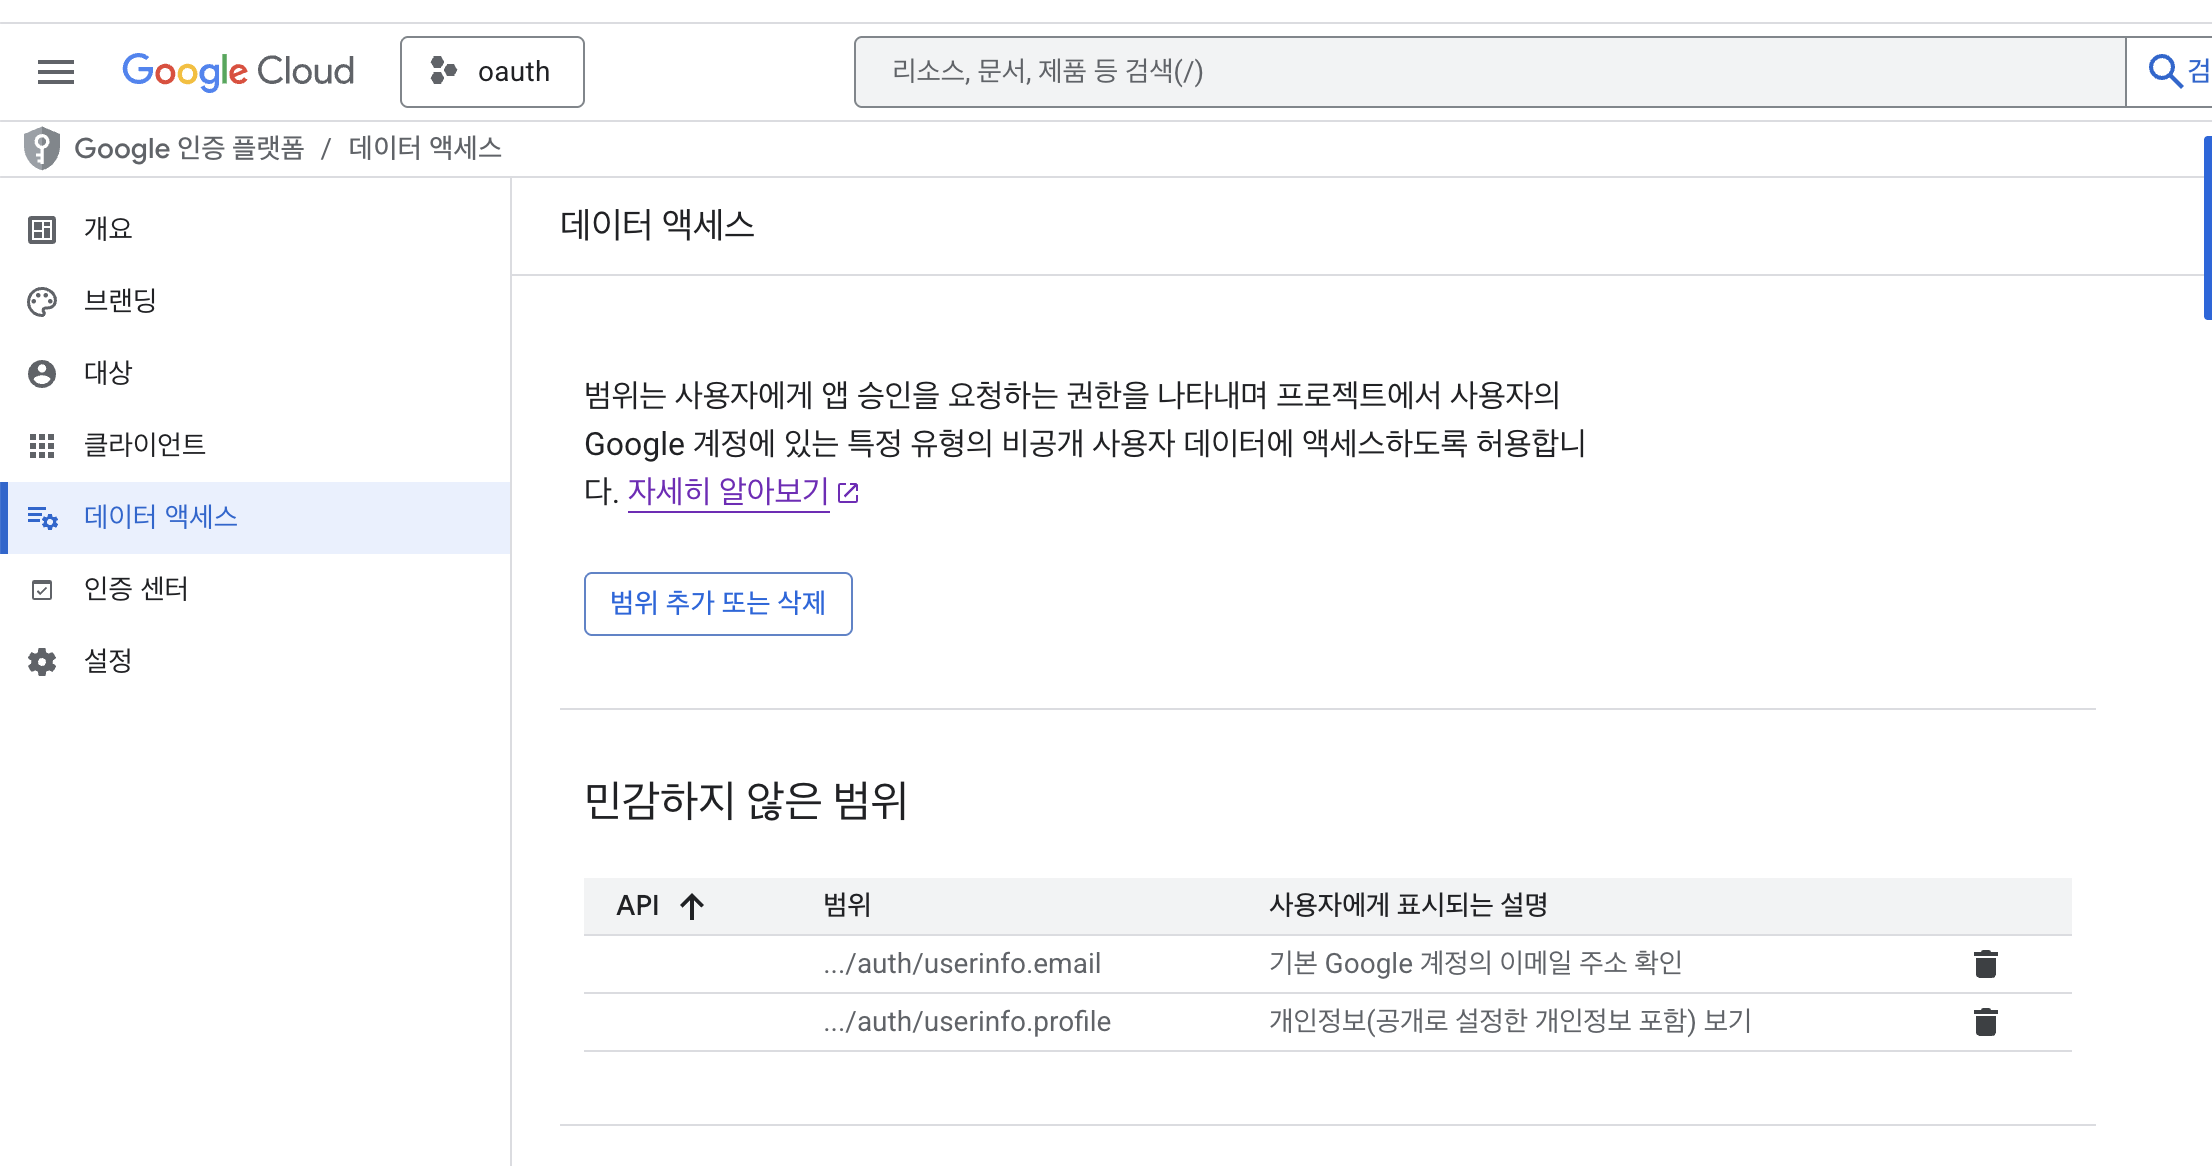
추가로 연동 시 가져오고자 하는 데이터는 데이터 액세스 메뉴에서 작업한다.
프로젝트 구성
Spring boot 를 이용해 백엔드를 구성하고자 한다.
OAuth2 로그인 흐름
1
2
3
4
5
6
7
8
9
10
11
12
13
14
15
16
17
사용자                  Spring Security              Google              서버
  │                         │                         │                   │
  ├──── 보호된 URL 접근 ──────→│                         │                   │
  │                         ├─── 302 Google 로그인 ────→│                   │
  │                         │                         │                   │
  │  ◀── Google 로그인 페이지 ─┘                         │                   │
  │                                                   │                   │
  ├──── Google 인증 완료 ──────────────────────────────→│                   │
  │                                                   │                   │
  │                         │◀─ code 콜백 ─────────────┘                   │
  │                         │   /login/oauth2/code/google                 │
  │                         │                                             │
  │                         ├─ CustomOAuth2UserService.loadUser() ───────→│
  │                         │   → UserService.saveOrUpdate()              │
  │                         │   → email AES 암호화 후 DB 저장                │
  │                         │                                             │
  │◀──── 인증 완료, 요청 URL로 리다이렉트 ─────────────────────────────────────┘
내 서버의 로그인 url 을 요청하면 302 임시 리다이렉션을 통해 Google 로그인 화면으로 진입한다.
이제 구글 로그인이 정상적으로 완료되면 구글에서 내 서버의 Redirect URL에 사용자 데이터를 담아 호출해준다.
내 서버에서는 구글에서 준 데이터를 받아와 자체적인 인증 로직을 마무리 하면 된다.
의존성
1
2
3
4
5
6
7
8
9
10
11
12
13
14
15
// DB
implementation 'org.springframework.boot:spring-boot-h2console'
implementation 'org.springframework.boot:spring-boot-starter-data-jpa'

implementation 'org.springframework.boot:spring-boot-starter-webmvc'
implementation 'org.springframework.boot:spring-boot-starter-security-oauth2-client'

compileOnly 'org.projectlombok:lombok'

runtimeOnly 'com.h2database:h2'

annotationProcessor 'org.projectlombok:lombok'
testImplementation 'org.springframework.boot:spring-boot-starter-data-jpa-test'
testImplementation 'org.springframework.boot:spring-boot-starter-webmvc-test'
testRuntimeOnly 'org.junit.platform:junit-platform-launcher'
OAuth 인증 후 응답된 데이터를 회원 테이블에 작업하기 위해 h2로 간단히 구현.
BE 구성을 위한 WebMVC와 OAuth2 작업을 위한 security-oauth2-client 의존성을 추가했다.
properties
oauth2 를 위한 설정값
1
2
3
4
5
6
7
8
9
10
11
spring:
	security:
	  oauth2:
	    client:
	      registration:
	        google:
	          client-id: ${GOOGLE_CLIENT_ID}
	          client-secret: ${GOOGLE_CLIENT_SECRET}
	          scope:
	            - email
	            - profile
${GOOGLE_CLIENT_ID}, ${GOOGLE_CLIENT_SECRET} 이 두 값은 google console에서 조회 할 수 있다.
scope 는 oauth2 로그인 후 받고자 하는 값을 요청할 수 있다.
google api console 에서 미리 데이터 엑세스 지정을 해주어야 하며, scope 값 관련한 문서는 아래에서 확인 할 수 있다.
https://developers.google.com/identity/openid-connect/openid-connect?hl=ko#authenticationuriparameters
비즈니스 로직
Spring Security Config
필터를 이용해 OAuth2 서비스를 구성한다.
1
2
3
4
5
6
7
8
9
10
11
12
13
14
15
16
17
18
19
20
21
22
@Configuration
@EnableWebSecurity
@RequiredArgsConstructor
public class SecurityConfig {

    private final CustomOAuth2UserService customOAuth2UserService;

    @Bean
    public SecurityFilterChain securityFilterChain(HttpSecurity http) throws Exception {
        http
				...
                .oauth2Login(oauth2 -> oauth2
                        .userInfoEndpoint(userInfo -> userInfo
                                .userService(customOAuth2UserService)
                        )

                )
				...

        return http.build();
    }
}
Custom User Service
1
2
3
4
5
6
7
8
9
10
11
12
13
14
15
16
17
@Service
@RequiredArgsConstructor
public class CustomOAuth2UserService implements OAuth2UserService<OAuth2UserRequest, OAuth2User> {

    private final OAuth2UserService<OAuth2UserRequest, OAuth2User> delegate = new DefaultOAuth2UserService();
    private final UserService userService;

    @Override
    public OAuth2User loadUser(OAuth2UserRequest userRequest) throws OAuth2AuthenticationException {
        OAuth2User oAuth2User = delegate.loadUser(userRequest);

        OAuthAttributes attributes = OAuthAttributes.ofGoogle(oAuth2User.getAttributes());
        userService.saveOrUpdate(attributes);

        return oAuth2User;
    }
}
delegate.loadUser(userRequest); 를 통해 구글 로그인에서 받아온 유저 정보를 로드한다.
이후 직접 작성한 비즈니스 로직을 추가 (사용자 데이터를 파싱하고 서비스를 통해 DB에 최신화 한다.)
간단하게 Google만 테스트 해봤는데 provider 별로 응답 받는 값이 다르거나,
JWT 토큰 정책, 만료 정책 등이 복잡한 이유가 되는 것 같다.
예제는 계속 Spring boot 4 & JDK 25 스펙으로 작업중인데 boot 3 과의 라이브러리 차이가 꽤 많이 있는 듯 하다.